11 Jun 2024

Installing/Checking Cisco Anyconnect VPN/Secure Client licenses for Cisco ASA devices

There are currently two licensing models for Cisco Secure Client, that is until Cisco decides to change or rename them once again!

* Cisco Secure Client Plus

* Cisco Anyconnect APEX

The APEX features also cover the ones in Plus, so simply a basic and advanced license. The important thing is the change to a total unique-user and term-based model. This means if you have 1000 users, you buy 1000 licenses, even if you will never have 1000 concurrent connected users. Then you can install this license to as many Cisco ASA devices as you want. (Check  Reference Link #1 and under Sharing Process to install to devices with different serial numbers)

To check your current license in a Cisco ASA 8.3+ device, use the "show activation-key" command. Under Licensed features for this platform you will get the license numbers for this current device. The naming might be confusing here, so AnyConnect Premium Peers shows APEX licenses, AnyConnect Essentials shows Plus licenses.

The important thing here is, IF you have High Availability setup with active/standby units, the licenses will be combined. Different features have different calculations for combining the licenses. VPN licenses add up to each other. As long as the devices stay in the HA setup, they will both use the combined licenses numbers. 

The combined numbers are listed under: Failover cluster licensed features for this platform

For example primary device below has only 2 Premium licenses, but since the standby unit has 5000, both devices will be available for 5000 VPN users.

To check the actual licenses installed in the standby unit, use the command: "failover exec standby show activation-key"

You will receive activation keys, when you use PAK/PIN to generate licenses with the specific serial-numbers of the devices.

To install these use the command: "activation-key 0xXYZ 0xXYZ"

Don't forget to install a license on your Standby Unit! This will have to have been generated with the devices own serial number. Command: "failover exec standby activation-key 0xXYZ 0xXYZ"

I remind this, because if you ever separate the devices, and break the HA setup, the device will revert to the actual licenses installed on itself, instead of using the combined licensing model.

You can check the reference links below for Cisco Documentation on this topic.


fw# show activation-key

Serial Number:  FCHxxxxxxx
Running Permanent Activation Key: 0xXYZ 0xXYZ

Licensed features for this platform:
Maximum Physical Interfaces       : Unlimited      perpetual
Maximum VLANs                     : 500            perpetual
Inside Hosts                      : Unlimited      perpetual
Failover                          : Active/Active  perpetual
Encryption-DES                    : Enabled        perpetual
Encryption-3DES-AES               : Enabled        perpetual
Security Contexts                 : 2              perpetual
Carrier                           : Disabled       perpetual
AnyConnect Premium Peers          : 2              perpetual
AnyConnect Essentials             : Disabled       perpetual
Other VPN Peers                   : 5000           perpetual
Total VPN Peers                   : 5000           perpetual
AnyConnect for Mobile             : Disabled       perpetual
AnyConnect for Cisco VPN Phone    : Disabled       perpetual
Advanced Endpoint Assessment      : Disabled       perpetual
Shared License                    : Disabled       perpetual
Total TLS Proxy Sessions          : 2              perpetual
Botnet Traffic Filter             : Disabled       perpetual
IPS Module                        : Disabled       perpetual
Cluster                           : Enabled        perpetual
Cluster Members                   : 2              perpetual

This platform has an ASA5555 VPN Premium license.

Failover cluster licensed features for this platform:
Maximum Physical Interfaces       : Unlimited      perpetual
Maximum VLANs                     : 500            perpetual
Inside Hosts                      : Unlimited      perpetual
Failover                          : Active/Active  perpetual
Encryption-DES                    : Enabled        perpetual
Encryption-3DES-AES               : Enabled        perpetual
Security Contexts                 : 4              perpetual
Carrier                           : Disabled       perpetual
AnyConnect Premium Peers          : 5000           perpetual
AnyConnect Essentials             : Disabled       perpetual
Other VPN Peers                   : 5000           perpetual
Total VPN Peers                   : 5000           perpetual
AnyConnect for Mobile             : Enabled        perpetual
AnyConnect for Cisco VPN Phone    : Enabled        perpetual
Advanced Endpoint Assessment      : Enabled        perpetual
Shared License                    : Disabled       perpetual
Total TLS Proxy Sessions          : 4              perpetual
Botnet Traffic Filter             : Disabled       perpetual
IPS Module                        : Disabled       perpetual
Cluster                           : Enabled        perpetual

This platform has an ASA5555 VPN Premium license.

The flash permanent activation key is the SAME as the running permanent key.


References:

  1. Cisco Secure Client Licensing FAQ
  2. Cisco ASA Licensing documentation
  3. Secure Client Ordering Guide
  4. End-Of-Life announcement for Cisco Anyconnect Secure Mobility Client 4.x 

1 Feb 2024

Spanning Tree Protection

Here are my notes on STP protection methods.

Root Guard
Port never becomes Root Port.
Guards against receiving an unwanted/unexpected Superior BPDU
If received, Port is put into root-inconsistent state. Entire port is disabled.
When superior BPDU is no more received, port cycles back through STP States.
Default disabled on switch ports.

(config-if)# spanning-tree guard root
# show span inconsistent-ports

BPDU Guard
Used on ports that a BPDU would never be received. (eg: Access ports)
If any BPDU is received, port is put into err-disabled state.
You recover either manually or using an errdisable timeout.
Default disabled on switch ports. Enabled on all Portfast ports.

# spanning-tree portfast bpduguard default
(config-if)# [no] span bpduguard enable

Loop Guard
Used to track BPDU activity. If a non-designated port stops receiving BPDUs, instead of transitioning through STP States, port is put into loop-inconsistent state. Port is blocked on per-VLAN-basis, until BPDUs are received again, moves through states.
In EtherChannel, the whole channel is blocked for that VLAN.
Default disabled on switch ports.

# span loopguard default
(config-if)# [no] span guard loop

UDLD
Protects against Unidirectional links. (Fiber TX/RX links)
Echos special Layer 2 UDLD messages in intervals. (Default 15 sec)
Normal mode, only syslog is entered,
aggresive mode, recovery is tried and port is errdisabled.
On EtherChannel only offending link is disabled.
Default disabled on all ports, if globally enabled, only fiber ports are configured.

# udld {enable | aggressive | message time seconds}
(config-if)# udld {enable | aggresive | disable}
# show udld
# reset udld (re-enable errdisabled UDLD ports)

BPDU Filter
Used to prevent BPDUs from being sent and processed on that port.
Effectively disables STP on the port.
Default disabled.

# span portfast bpdufilter default
(config-if)# span bpdufilter {enable | disable}


stp protection

31 Jan 2024

802.1D Spanning Tree Protocol (vanilla)

I do a lot of Switch/VLAN migration these days because of the ongoing Data Center migration, so a Spanning Tree refreshment was necessary, here are some of my notes on the topic.

Convergence phases
1. Elect Root Bridge
2. Elect a Root Port for each switch
3. Elect designated ports for each segment

STP Algorithm
Root BridgeID (priority + MAC) (8 bits = 2+6)
Root Path Cost
Sender BID
Sender PortID (port priority + port number)

Port Roles
Root Port
Designated Port
Blocked Port

Port States
Disabled
Blocking
Listening
Learning
Forwarding


Types of BPDU
Configuration BPDU (sent by root bridge, default every 2 seconds)
TCN BPDU (Topology Change Notification, the detecting bridge sends upstream)
BPDU with TCA set (TC Ack, the upstream bridge receiving TCN sends this back)
BPDU with TC flag (Root bridge sends this downstream, to tell other bridges to age their CAM tables, in Forward-Delay time)

Cisco Proprietary enhancements
PortFast: Use in ports with only hosts, skips Listen/Learn and jumps to Forwarding
UplinkFast: Use in Access Layer, to detect direct failures. Tracks backup root port and raises it to Forwarding state quickly. (Cuts back 15+15 seconds)
BackboneFast: Used to detect indirect failures. All switches must enable. Uses RLQ (Root Link Query) mechanism to detect topology. (Cuts back on 10 sec. of Max-Age timer)

Useful show commands
show span summary
show span root
show span bridge
show span vlan xxx
show span vlan xxx detail


20 Dec 2023

Linux - System Performance tools

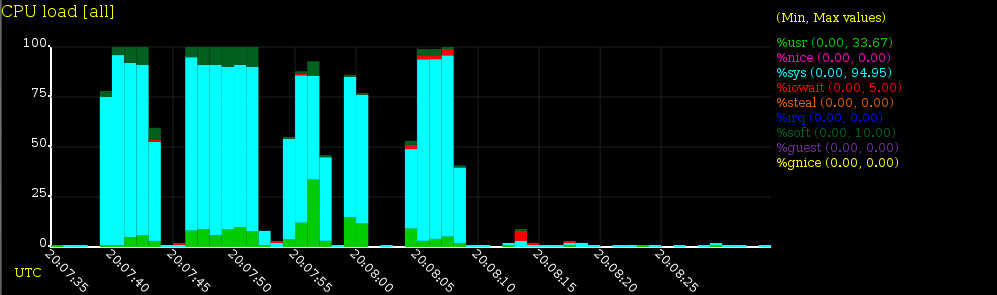
sysstat is a great set of tools that you can use to collect statistics for I/O, CPU, memory, network and processes for troubleshooting and monitoring purposes.

Here's summary of the tools.

  • iostat reports CPU statistics and input/output statistics for block devices and partitions.
  • mpstat reports individual or combined processor related statistics.
  • pidstat reports statistics for Linux tasks (processes) : I/O, CPU, memory, etc.
  • tapestat reports statistics for tape drives connected to the system.
  • cifsiostat reports CIFS statistics.

Sysstat also contains tools you can schedule via cron or systemd to collect and historize performance and activity data:

  • sar collects, reports and saves system activity information (see below a list of metrics collected by sar).
  • sadc is the system activity data collector, used as a backend for sar.
  • sa1 collects and stores binary data in the system activity daily data file. It is a front end to sadc designed to be run from cron or systemd.
  • sa2 writes a summarized daily activity report. It is a front end to sar designed to be run from cron or systemd.
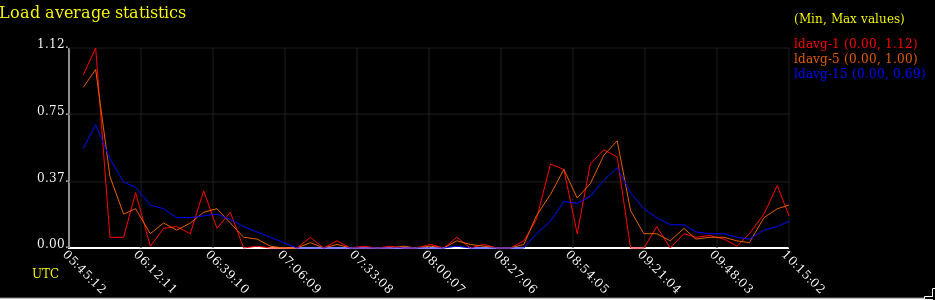
  • sadf displays data collected by sar in multiple formats (CSV, XML, JSON, etc.) and can be used for data exchange with other programs. This command can also be used to draw graphs for the various activities collected by sar using SVG (Scalable Vector Graphics) format.


11 Dec 2023

IPsec VPN Lab, with stateful failover (SSO, Dual Interface Model)


Lots of stuff going on here.
We have two sites for our company named Central-Office and Branch-33.

The CO is connected to our ISP w/ two edge routers, CE_1 w/ an E3 line and CE_2 w/ a backup E1 line. Our branch33 site is using R4, which will establish the IPSec tunnels, allowing the private networks 10.1.33.0/21 talk to the central office 10.1.8.0/21 networks.

Behing them are the two IPSec Concentrators (R1 and R2, 7200 Cisco routers) which have public IP addresses on their out facing interfaces. Here all 4 routers connected to a switch, but of course in a production network you would have redundant switches there also.

Two first hop redundancy plans are integrated as an HSRP group facing to our internal network and the HSRP group facing to our edge routers, which also provides the IPsec redundandcy.

Crypto maps are setup as SSO stateful failover, R1 acting as the primary IPsec point, with R2 being the standby.

There is an extra flavor as IP SLA and reachability tracking is done where R1 and R2 are checking their next-hop routers to the outside world, CE_1 & CE_2. No routing protocol is run inside our company, for claritys sake. Thus we have two static default routes w/ different AD and the mentioned icmp tracking.

One Note, considering the Stateful Failover: "Each time an active device relinquishes control to become the standby device, the active device will reload. This functionality ensures that the state of the new standby device synchronizes correctly with the new active device." (Ref) So since Dynamips doesnt support reloading, the Router dynamips process will crash and you must shut down and turn on the router again to get it going.

Download Project files for GNS3

Links:
Cisco High Availability Solution: Stateful Failover for IPsec
Fun with IPsec stateful failover @ packetlife

9 Nov 2023

Clear VTY Lines

Sometimes a switch/router won't let you connect to it. Coming back as telnet/shh connection refused. If the hardware is otherwise functioning correctly, its likely that your VTY lines are full.
This is how you can:
see all sessions / see active sessions / kill sessions

# sh users all
# sh users
# clear line

15 Sept 2023

Better Wireshark Font/Colors setup

 One of the first things I configure in a newly installed Wireshark is the color for the active/inactive selected item. Normally this item will be displayed in a color which is very close to the default colors for normal packets and its hard to see which line/packet you are on and displaying the details for. So this configuration will make it very easy to see quickly where you are in the file.


20 Aug 2023

Removing Fortigate Reminders on Login to Dashboard

When logging into Fortigate, certain operations are checked and a reminder window has to be passed before you get to the dashboard. For example you will definetly have this window show up after a firmware upgrade. If you have the actions planned for a later date do not want to get the reminder window here's how.


config system global

set gui-forticare-registration-setup-warning disable

set gui-firmware-upgrade-warning disable 

end 


12 Jun 2023

Cisco ASA IPsec setup

Cisco ASA has a different way setting up Phase1/Phase2 parameters for an IPsec tunnel. Where other vendors have specific menu/commands to enter the specific Phase1/Phase2 parameters, here we have groups of commands to accomplish basically the same thing.

PHASE 1

Enter your acceptable Phase1 parameters which will be offered for negotiation with the other ipsec peer.

For IKEv1:

#crypto ikev1 policy 10
   encryption 3des
   hash sha
   group 2
   lifetime 28800
#crypto ikev1 policy 20
   authentication rsa-sig
   encryption aes-256
   hash sha
   group 5
   lifetime 86400
   authentication pre-share

or for IKEv2:

#crypto ikev2 policy 2
   encryption aes-256
   integrity sha
   group 14
   prf sha
   lifetime seconds 86400

Then you setup the "tunnel-group" for attributes and most importantly pre-shared key (or certificate)

#tunnel-group 182.11.104.167 type ipsec-l2l
#tunnel-group 182.11.104.167 general-attributes
   default-group-policy Turkcell_GroupPolicy2
#tunnel-group 182.11.104.167 ipsec-attributes
   ikev1 pre-shared-key *****


PHASE 2

#crypto ipsec ikev1 transform-set ESP-AES-128-SHA esp-aes esp-sha-hmac
#crypto ipsec ikev1 transform-set ESP-AES-128-MD5 esp-aes esp-md5-hmac
#crypto ipsec ikev1 transform-set ESP-AES-192-SHA esp-aes-192 esp-sha-hmac

#crypto ipsec ikev2 ipsec-proposal STRONGPROPOSAL
   protocol esp encryption aes-256
   protocol esp integrity sha-1
#crypto ipsec ikev2 ipsec-proposal WEAKPROPOSAL 
   protocol esp encryption 3des
   protocol esp integrity sha-1

Here's where we define the interesting traffic and 

IKEv1 example cryptomap entry:

crypto map outside_map1 1 match address outside_cryptomap
crypto map outside_map1 1 set pfs group5
crypto map outside_map1 1 set peer 182.11.104.167
crypto map outside_map1 1 set ikev1 transform-set ESP-AES-256-SHA
crypto map outside_map1 1 set security-association lifetime seconds 28800

an IKEv2 example cryptomap entry:

crypto map internet_map0 1 match address internet_cryptomap
crypto map internet_map0 1 set peer 182.11.104.167
crypto map internet_map0 1 set ikev2 ipsec-proposal AES256-SHA1
crypto map internet_map0 interface internet


16 Mar 2023

Loading a new site certificate to FortiAuthenticator

You can receive the following error message when trying to import a PKCS12 (.p12 or .pfx) file into the FortiAuthenticator to use as a certificate/private key pair for your Portal or anyother Local Service.


Unsupported cipher algorithm. This can happen if the PKCS12 file uses unsupported weak ciphers, e.g. RC2. Use the OpenSSL command 'openssl pkcs12 -info -in <file>' to view the file's ciphers on a computer.

One of the reasons this can happen is FortiAuthenticator rejects any PFX files which contain certificate or keys that are encrypted with weak ciphers. So to check what your PFX file contains use openssl.

$ openssl pkcs12 -info -in myexample.pfx
Enter Import Password:

This will give you output listing, Your Private Key encryption cipher:

Shrouded Keybag: pbeWithSHA1And3-KeyTripleDES-CBC, Iteration 2000

And the ciphers used to encrypt the certificates:

PKCS7 Encrypted data: pbeWithSHA1And40BitRC2-CBC, Iteration 2000

We can see here that FortiAuthenticator was right to determine that your PFX file has a3DES encrpyted private key and 40BitRC2 encrypted certificates inside.

Let's see how you fix this and allow FortiAuthenticator to install your PFX file.

One way is to export the private key and certificates to seperate files and use the FortiAuthenticator GUI option to load "Certificate and Private Key"

To get seperate files use the following openssl commands:

openssl pkcs12 -in myexample.pfx -out myexample_certs.pem -nokeys -clcerts
openssl pkcs12 -in myexample.pfx -out myexample_privkey.pem -nocerts -nodes 
     
The alternative to this is to create a new PFX file with stronger ciphers, one that FortiAuthenticator will not reject. This method will have the benefit of teaching you how to create PFX files with openssl.


22 Feb 2023

IOS Packaging

Starting with version 12.3, Cisco introduced a new IOS packaging system for routers and switches.

Here are some links from cisco for detailed explanation:
Cisco IOS Packaging Product Bulletin
IOS Packaging, main page
Cisco IOS Packaging Customer Q&A

9 Jan 2023

Building a Security Operations Center (SOC), notes on a blog post

Building a Security Operations Center (SOC): Sharing Experiences from the Front Lines Link

The link above will take you to a very informative blog article on the process of building a Security Operation Center (SOC) and things you must consider, information you should gather while working on this project. The blog is from a website that has since disappeared, but luckily we can read it from the Wayback Machine. Anyway, here are my notes from following this informative peace:


SOC's normally have teams for:

  • Incident Response
  • Vulnerability Management
  • Engineering
  • Threat Intelligence
  • Threat Hunting
The start-up process
  • Find what's plugged into your network (asset management)
  • Reduce Noise (find out the "Normal Behavior", which will prevent false positives). Thus anything outside Policy is now an incident
  • Develop "right" policies, make all employees aware
SOC Infrastructure

The SOC has it's own applications and infrastructure.
  • Security Information and Event Management (SIEM) platform. Needs to meet your needs, good integration with your IT Service Management platform, liked and experienced by your Incident Response team, be scalable, costs inside your budget.
  • Incident Management platform. Needs to have good integration with your SIEM, EDR.
  • Sysmon or Endpoint Detection and Response (EDR)
  • Vulnerability scanner
Communication with other departments
Start with IT Services teams such as System/Service admins, Network team, IAM/Active Directory team, Antivirus team if there is one. Then as the SOC matures, Legal and Privacy departments will need communication and collaboration policies with the SOC.

Collaboration within the SOC


"Threat Intelligence (TI) feeds information to Vulnerability Management (VM), Threat Hunting (TH) and Incident Response (IR). VM takes this information to find out how many systems are vulnerable to the potential threat. IR adds the shared Indicators of Compromise (IOCs) to its detections rules. Threat Hunting (TH) proactively searches in the network for Techniques, Tactics and Procedures (TTPs) based on those IOCs. If Threat Hunting finds activity following those TTPs, if the SIEM triggers an alert based on a IOC hit, or if there is evidence supporting that a vulnerability has been exploited, an incident is raised for the IR team to handle"


Read more details in this fantastic blog post:
Building a Security Operations Center (SOC): Sharing Experiences from the Front Lines


Reference Books for this topic:
  • The Tao of Network Security Monitoring
  • Incident Response & Computer Forensics

23 Mar 2022

Packet Capture / Sniffer setup on a Fortigate without a disk

Here's how I go about to capture packets in a Fortigate Firewall which does not have a disk.

1. Use a good SSH Client that can log the session, such as putty. And setup the log session to file feature.
This will than allow me to get the capture output as a text file and run through the utility that converts it to a pcap file.


2. Setup the sniffer on Fortigate:

diagnose sniffer packet <interface_name> <‘filter’> <verbose> <count> <tsformat>

For example:

diagnose sniffer packet any "host <src_host_ip> and host <dst_host_ip>" 6

(verbose=6 gives interface names to the output, we'll get as much info as we need, thus the maximum level of verboseness)


3. Cleanup the text file and run it through the conversion utility.

Fortinet utility (there's linux perl and windows exe version here)

Usage: 

fgt2eth.exe -in <file captured>.txt -out <output name>.cap


Alternatives which I haven't test yet:

fgsniffer (announcement post on fortinet forums)

sniftran 


4. Open the converted pcap file in Wireshark.

5. Get a dark coffee and dive deep into the capture! :)


Ref: Knowledge base article (Fortigate)

8 Feb 2022

Netflow setup for Cisco devices

Let's see how we Export Netflow from Cisco Switches to Solarwinds Netflow:

  1. Create Flow Record
  2. Create Flow Exporter
  3. Create Flow Monitor
  4. Apply flow monitor to interfaces


Example for Cisco Catalyst 9200/9300 devices

This setup will also solve the following error Solarwinds gives when exporting netflow from Cat9200/9300:
"The NetFlow Receiver Service [Solarwinds-Host] received an invalid V9 template with ID 256 from device . See knowledge base for more information."

Then you must do a similar configuration to the following: 

flow record NETFLOW_INPUT_RECORD
match ipv4 tos
match ipv4 protocol
match ipv4 source address
match ipv4 destination address
match transport source-port
match transport destination-port
match flow direction
match interface input
collect counter bytes long
collect counter packets long
!
flow record NETFLOW_OUTPUT_RECORD
match ipv4 tos
match ipv4 protocol
match ipv4 source address
match ipv4 destination address
match transport source-port
match transport destination-port
match flow direction
match interface output
collect counter bytes long
collect counter packets long
!
flow exporter NETFLOW_EXPORTER
destination <ip_address_of_Solarwinds_server>
source <your_source_interface_for_netflow_traffic>
transport udp 2055
!
flow monitor NETFLOW_MONITOR_OUTPUT
exporter NETFLOW_EXPORTER
record NETFLOW_OUTPUT_RECORD
!
flow monitor NETFLOW_MONITOR_INPUT
exporter NETFLOW_EXPORTER
record NETFLOW_INPUT_RECORD
!
sampler NETFLOW_SAMPLER
mode random 1 out-of 2
!
interface <the_interface_which_you_want_to_export_netflow_of>
ip flow monitor NETFLOW_MONITOR_INPUT sampler NETFLOW_SAMPLER input
ip flow monitor NETFLOW_MONITOR_OUTPUT sampler NETFLOW_SAMPLER output
!


NOTES:

 If you have NBAR:

#collect application name

If you use BGP:
#collect routing source as
#collect routing destination as


Some Other Links:


10 Nov 2021

History of Computer Science in Graceland College

Between 1998 and 2002, I studied Computer Science in Graceland College (now called Graceland University)

My programming teacher was Gary Hasman and Unix teacher was Jim Jones. The curriculum included topics such as Object Oriented Programming, C++, Java, Assembly, Unix, Bash/Perl scripting, Operation Systems, Database Administration and SQL.

Here's an article about the history of Computer Science at Graceland by Jim Jones: Link

30 Dec 2019

Red Teaming information

I read a good article about red teaming: https://medium.com/@dmchell/what-ive-learned-in-over-a-decade-of-red-teaming-5c0b685c67a2

Here are some Red Team firms:


Good Links: